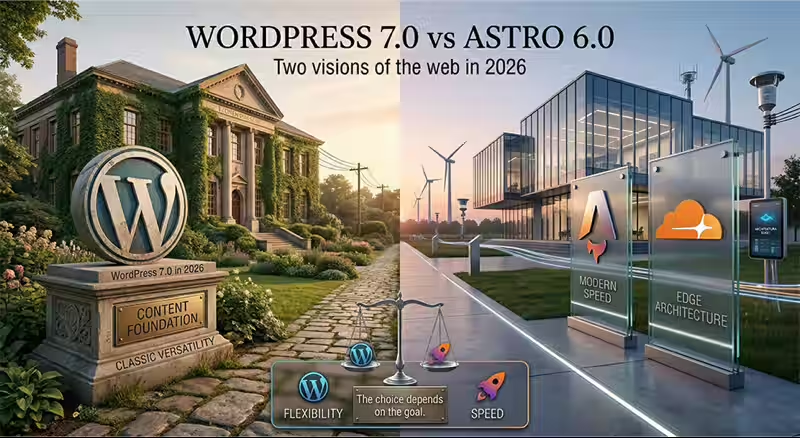
WordPress development has outgrown FTP uploads and shared hosting panels. In 2026, professional teams treat WordPress like any other software project, with version-controlled dependencies, containerized environments, and automated deployment pipelines. If you are still editing files directly on a live server, this guide will change how you work.
This tutorial covers two complementary approaches to modern WordPress development: Docker Compose for reproducible server environments and Composer with Bedrock for dependency management. You will get complete, copy-paste-ready configuration files, Xdebug setup for proper PHP debugging, and a deployment workflow that takes your code from a local machine to production safely.
Why the traditional WordPress setup is holding you back
The classic approach of downloading a ZIP file from wordpress.org and uploading it via FTP creates several problems that compound over time:
- Environment drift - your local MAMP or XAMPP setup never matches the production server exactly, leading to “works on my machine” bugs.
- No dependency tracking - plugins and themes are manually downloaded and updated, making it impossible to reproduce the exact same site on another machine.
- No version control for core - WordPress core files sit in your repository (or worse, are not tracked at all), mixing application code with framework code.
- Manual deployments - copying files over FTP is error-prone and provides no rollback mechanism.
Docker and Composer solve each of these problems systematically.
Setting up WordPress with Docker Compose
Docker Compose lets you define your entire server stack in a single YAML file. Every developer on the team gets the exact same PHP version, MySQL version, and server configuration by running one command.
Prerequisites
Install Docker Desktop for your operating system. Docker Desktop includes both the Docker engine and the docker compose CLI plugin. Verify the installation:
docker --version
docker compose versionProject structure
Create a clean project directory:
mkdir wordpress-docker && cd wordpress-docker
mkdir -p wp-content/themes wp-content/plugins wp-content/uploadsThe complete docker-compose.yml
Create a docker-compose.yml file in your project root:
version: "3.9"

services:
  db:
    image: mysql:8.0
    container_name: wp_mysql
    restart: unless-stopped
    environment:
      MYSQL_DATABASE: ${DB_NAME:-wordpress}
      MYSQL_USER: ${DB_USER:-wpuser}
      MYSQL_PASSWORD: ${DB_PASSWORD:-wppassword}
      MYSQL_ROOT_PASSWORD: ${DB_ROOT_PASSWORD:-rootpassword}
    volumes:
      - db_data:/var/lib/mysql
    ports:
      - "3306:3306"
    networks:
      - wp_network
    healthcheck:
      test: ["CMD", "mysqladmin", "ping", "-h", "localhost"]
      interval: 10s
      timeout: 5s
      retries: 5

  wordpress:
    image: wordpress:6.7-php8.3-apache
    container_name: wp_app
    restart: unless-stopped
    depends_on:
      db:
        condition: service_healthy
    environment:
      WORDPRESS_DB_HOST: db:3306
      WORDPRESS_DB_NAME: ${DB_NAME:-wordpress}
      WORDPRESS_DB_USER: ${DB_USER:-wpuser}
      WORDPRESS_DB_PASSWORD: ${DB_PASSWORD:-wppassword}
      WORDPRESS_DEBUG: ${WP_DEBUG:-1}
      WORDPRESS_CONFIG_EXTRA: |
        define('WP_DEBUG_LOG', true);
        define('WP_DEBUG_DISPLAY', false);
        define('SCRIPT_DEBUG', true);
        define('DISALLOW_FILE_EDIT', true);
    volumes:
      - ./wp-content/themes:/var/www/html/wp-content/themes
      - ./wp-content/plugins:/var/www/html/wp-content/plugins
      - ./wp-content/uploads:/var/www/html/wp-content/uploads
      - ./php-custom.ini:/usr/local/etc/php/conf.d/custom.ini
    ports:
      - "8080:80"
    networks:
      - wp_network

  phpmyadmin:
    image: phpmyadmin:5
    container_name: wp_phpmyadmin
    restart: unless-stopped
    depends_on:
      - db
    environment:
      PMA_HOST: db
      PMA_PORT: 3306
      MYSQL_ROOT_PASSWORD: ${DB_ROOT_PASSWORD:-rootpassword}
    ports:
      - "8081:80"
    networks:
      - wp_network

  mailhog:
    image: mailhog/mailhog:latest
    container_name: wp_mailhog
    ports:
      - "1025:1025"
      - "8025:8025"
    networks:
      - wp_network

volumes:
  db_data:

networks:
  wp_network:
    driver: bridge
This configuration gives you four services:
- MySQL 8.0 with a health check so WordPress waits for the database to be ready before starting.
- WordPress 6.7 on PHP 8.3 with Apache, mounting only your custom themes, plugins, and uploads.
- phpMyAdmin for visual database management at
http://localhost:8081. - MailHog for capturing outgoing emails during development at
http://localhost:8025.
Environment variables with .env
Create a .env file in the project root:
# Database
DB_NAME=wordpress
DB_USER=wpuser
DB_PASSWORD=secure_local_password_2026
DB_ROOT_PASSWORD=secure_root_password_2026

# WordPress
WP_DEBUG=1

# Site
SITE_URL=http://localhost:8080
Docker Compose automatically reads .env files from the project directory. Add .env to your .gitignore immediately and commit a .env.example template instead.
Custom PHP configuration
Create php-custom.ini for development-friendly PHP settings:
upload_max_filesize = 128M
post_max_size = 128M
memory_limit = 512M
max_execution_time = 300
max_input_vars = 3000
display_errors = On
error_reporting = E_ALLStarting the environment
docker compose up -dOpen http://localhost:8080 and complete the WordPress installation. Your themes and plugins directories are mounted from the host machine, so any changes you make in your editor appear instantly in the running WordPress instance.
Useful Docker commands for daily work
# View logs from all containers
docker compose logs -f

# View logs from WordPress only
docker compose logs -f wordpress

# Open a shell inside the WordPress container
docker compose exec wordpress bash

# Run WP-CLI commands inside the container
docker compose exec wordpress wp plugin list --allow-root

# Stop all containers (preserves data)
docker compose stop

# Stop and remove containers (preserves volume data)
docker compose down

# Full reset including database
docker compose down -vComposer-based WordPress with Bedrock
While Docker handles the server environment, Bedrock by Roots restructures WordPress itself into a proper Composer-managed application. Bedrock treats WordPress core as a dependency, not as the project root, which changes everything about how you manage and deploy WordPress.
Why Bedrock matters
Standard WordPress mixes application code (your theme, plugins) with framework code (wp-admin, wp-includes) in the same directory. Bedrock separates these concerns:
project-root/
  config/              # Environment-specific configuration
    application.php
    environments/
      development.php
      staging.php
      production.php
  web/                 # Document root (public)
    app/               # wp-content equivalent
      themes/
      plugins/
      uploads/
    wp/                # WordPress core (Composer-managed)
    wp-config.php      # Minimal loader
  vendor/              # Composer dependencies
  .env                 # Environment variables
  composer.json        # Dependency manifest
WordPress core lives in web/wp/ and is never modified. Your custom code lives in web/app/. The vendor/ directory and web/wp/ are both gitignored because Composer recreates them from composer.json.
Installing Bedrock
composer create-project roots/bedrock my-wordpress-project
cd my-wordpress-projectThe composer.json structure
Bedrock’s composer.json manages WordPress core, plugins, and themes as packages:
{
  "name": "your-agency/client-project",
  "type": "project",
  "license": "MIT",
  "description": "WordPress project managed with Bedrock and Composer",
  "require": {
    "php": ">=8.1",
    "composer/installers": "^2.3",
    "vlucas/phpdotenv": "^5.6",
    "oscarotero/env": "^2.1",
    "roots/bedrock-autoloader": "^1.0",
    "roots/bedrock-disallow-indexing": "^2.0",
    "roots/wordpress": "6.7.*",
    "roots/wp-config": "1.0.0",
    "roots/wp-password-bcrypt": "1.1.0",
    "wpackagist-plugin/wordpress-seo": "^23.0",
    "wpackagist-plugin/wp-super-cache": "^1.12",
    "wpackagist-plugin/wordfence": "^7.11"
  },
  "require-dev": {
    "squizlabs/php_codesniffer": "^3.10",
    "roave/security-advisories": "dev-latest"
  },
  "config": {
    "optimize-autoloader": true,
    "preferred-install": "dist",
    "allow-plugins": {
      "composer/installers": true,
      "roots/wordpress-core-installer": true
    }
  },
  "repositories": [
    {
      "type": "composer",
      "url": "https://wpackagist.org",
      "only": [
        "wpackagist-plugin/*",
        "wpackagist-theme/*"
      ]
    }
  ],
  "extra": {
    "installer-paths": {
      "web/app/mu-plugins/{$name}/": [
        "type:wordpress-muplugin"
      ],
      "web/app/plugins/{$name}/": [
        "type:wordpress-plugin"
      ],
      "web/app/themes/{$name}/": [
        "type:wordpress-theme"
      ]
    },
    "wordpress-install-dir": "web/wp"
  }
}
The key insight: WordPress Packagist mirrors the entire WordPress.org plugin and theme repository as Composer packages. Adding a plugin is as simple as:
composer require wpackagist-plugin/advanced-custom-fieldsRemoving it is equally clean:
composer remove wpackagist-plugin/advanced-custom-fieldsBedrock environment configuration
Bedrock uses .env files instead of hardcoding values in wp-config.php:
# .env file for Bedrock
DB_NAME=wordpress
DB_USER=wpuser
DB_PASSWORD=secure_local_password_2026
DB_HOST=db:3306
DB_PREFIX=wp_

WP_ENV=development
WP_HOME=http://localhost:8080
WP_SITEURL=${WP_HOME}/wp

# Generate these at https://roots.io/salts.html
AUTH_KEY='generate-unique-key-here'
SECURE_AUTH_KEY='generate-unique-key-here'
LOGGED_IN_KEY='generate-unique-key-here'
NONCE_KEY='generate-unique-key-here'
AUTH_SALT='generate-unique-salt-here'
SECURE_AUTH_SALT='generate-unique-salt-here'
LOGGED_IN_SALT='generate-unique-salt-here'
NONCE_SALT='generate-unique-salt-here'
Each environment (development, staging, production) has its own .env file on its respective server. The same codebase runs everywhere, with behavior controlled entirely by environment variables.
Combining Docker and Bedrock
The real power comes from running Bedrock inside Docker. Modify the docker-compose.yml to mount your Bedrock project instead of the default WordPress image:
services:
  wordpress:
    build:
      context: .
      dockerfile: Dockerfile
    volumes:
      - .:/var/www/html
    environment:
      - WP_ENV=development
With a custom Dockerfile:
FROM php:8.3-apache

RUN apt-get update && apt-get install -y \
    libzip-dev \
    libpng-dev \
    libjpeg-dev \
    libfreetype6-dev \
    libicu-dev \
    && docker-php-ext-configure gd --with-freetype --with-jpeg \
    && docker-php-ext-install \
    mysqli \
    pdo_mysql \
    zip \
    gd \
    intl \
    opcache

RUN a2enmod rewrite

COPY --from=composer:latest /usr/bin/composer /usr/bin/composer

ENV APACHE_DOCUMENT_ROOT /var/www/html/web

RUN sed -ri -e 's!/var/www/html!${APACHE_DOCUMENT_ROOT}!g' \
    /etc/apache2/sites-available/*.conf \
    /etc/apache2/apache2.conf

WORKDIR /var/www/html
This gives you a fully containerized Bedrock environment where composer install runs inside the container and the document root points to Bedrock’s web/ directory.
Xdebug setup for PHP debugging
Step-through debugging replaces var_dump and error_log with a proper debugger that lets you pause execution, inspect variables, and walk through code line by line.
Adding Xdebug to your Docker container
Create an xdebug.ini file:
[xdebug]
zend_extension=xdebug
xdebug.mode=debug,develop
xdebug.start_with_request=yes
xdebug.client_host=host.docker.internal
xdebug.client_port=9003
xdebug.discover_client_host=0
xdebug.log=/tmp/xdebug.log
xdebug.idekey=VSCODE
Add Xdebug installation to your Dockerfile:
RUN pecl install xdebug-3.3.2 \
    && docker-php-ext-enable xdebug

COPY xdebug.ini /usr/local/etc/php/conf.d/docker-php-ext-xdebug.iniVS Code configuration
Create .vscode/launch.json in your project root:
{
  "version": "0.2.0",
  "configurations": [
    {
      "name": "Listen for Xdebug (Docker)",
      "type": "php",
      "request": "launch",
      "port": 9003,
      "pathMappings": {
        "/var/www/html": "${workspaceFolder}"
      },
      "log": true
    }
  ]
}
Install the PHP Debug extension by Xdebug in VS Code, set a breakpoint in any PHP file, press F5 to start listening, and reload your WordPress page. The debugger will pause at your breakpoint.
PhpStorm configuration
PhpStorm handles Docker Xdebug connections natively:
- Go to Settings > PHP > Debug and verify port 9003 is set.
- Go to Settings > PHP > Servers, add a new server with
localhoston port8080, and configure the path mapping from/var/www/htmlto your project root. - Click the Start Listening for PHP Debug Connections button in the toolbar.
Deployment workflow: local to staging to production
A professional deployment pipeline ensures that code changes flow predictably from development to production without manual file copying.
The three-environment model
- Local (Docker) - where you write and test code.
- Staging - a server that mirrors production for final testing.
- Production - the live site.
Git-based deployment with GitHub Actions
Your repository should contain your theme, plugin, and Bedrock configuration code. It should not contain WordPress core, vendor/, or uploads/.
Example .github/workflows/deploy.yml:
name: Deploy to staging

on:
  push:
    branches: [staging]

jobs:
  deploy:
    runs-on: ubuntu-latest
    steps:
      - uses: actions/checkout@v4

      - name: Setup PHP
        uses: shivammathur/setup-php@v2
        with:
          php-version: "8.3"

      - name: Install dependencies
        run: composer install --no-dev --optimize-autoloader

      - name: Run code quality checks
        run: vendor/bin/phpcs --standard=WordPress web/app/themes/

      - name: Deploy via rsync
        uses: burnett01/rsync-deployments@7.0
        with:
          switches: -avz --delete --exclude='.env' --exclude='web/app/uploads/'
          path: ./
          remote_path: /var/www/staging.example.com/
          remote_host: ${{ secrets.STAGING_HOST }}
          remote_user: ${{ secrets.STAGING_USER }}
remote_key: ${{ secrets.STAGING_SSH_KEY }}Database and uploads synchronization
Code deploys through Git, but databases and media uploads require separate handling:
# Export production database
wp db export production-backup.sql --ssh=user@production

# Import to staging
wp db import production-backup.sql --ssh=user@staging

# Search-replace URLs
wp search-replace 'https://example.com' 'https://staging.example.com' --ssh=user@staging

# Sync uploads from production to staging
rsync -avz user@production:/var/www/html/web/app/uploads/ \
  user@staging:/var/www/html/web/app/uploads/
For local development, use WP-CLI’s wp db export and wp db import commands through Docker:
docker compose exec wordpress wp db export /tmp/backup.sql --allow-root
docker cp wp_app:/tmp/backup.sql ./backups/Comparison: Docker vs Composer vs LocalWP vs MAMP
| Feature | Docker Compose | Composer (Bedrock) | LocalWP | MAMP/XAMPP |
|---|---|---|---|---|
| Environment reproducibility | Excellent - defined in code | N/A (code management only) | Limited - per-machine | Limited - per-machine |
| Team consistency | Full parity across machines | Full parity for dependencies | Manual setup per developer | Manual setup per developer |
| PHP version control | Exact version in Dockerfile | Requires separate server | Switchable per site | Global setting |
| Dependency management | N/A (server only) | Excellent - composer.lock | None | None |
| Production parity | Matches production exactly | Matches production dependencies | Approximate | Approximate |
| Learning curve | Moderate - requires CLI comfort | Moderate - PHP ecosystem knowledge | Low - GUI-based | Low - GUI-based |
| CI/CD integration | Native | Native | None | None |
| Multi-project isolation | Complete container isolation | Separate per project | Separate per site | Shared server |
| Custom server configs | Full control | N/A | Limited | Limited |
| Startup speed | Moderate (first pull is slow) | Fast (composer install) | Fast | Fast |
The key takeaway: Docker and Composer are complementary, not competing. Docker replaces MAMP/XAMPP as your server environment, while Composer replaces manual plugin/theme management. LocalWP remains a valid choice for quick prototyping, but it lacks the reproducibility and CI/CD integration that professional teams need.
Performance tips for Docker on macOS
Docker on macOS historically suffered from slow file system performance due to the virtualization layer. In 2026, Docker Desktop uses VirtioFS by default, which dramatically improves I/O speeds. If you are still experiencing slowness:
- Verify VirtioFS is enabled in Docker Desktop > Settings > General.
- Limit mounted volumes to only what you need (themes, plugins, uploads), not the entire WordPress installation.
- Use Docker’s built-in caching directives if needed:
volumes: - ./wp-content:/var/www/html/wp-content:cached. - Allocate sufficient resources in Docker Desktop > Settings > Resources (at least 4 GB RAM and 2 CPUs).
Security considerations for local development
Even in local environments, security habits matter because configurations often leak into production:
- Never commit
.envfiles to Git. Use.env.exampleas a template. - Use strong, unique passwords in your
.enveven locally, so you never accidentally deploy weak credentials. - Keep
DISALLOW_FILE_EDITset totruein all environments. - Run
composer auditregularly to check for known vulnerabilities in your dependencies. - Pin specific versions in
composer.jsonfor production deployments rather than using loose version constraints.
Troubleshooting common issues
MySQL container exits immediately
Check logs with docker compose logs db. The most common cause is an existing volume with incompatible data. Run docker compose down -v to remove volumes and start fresh.
WordPress cannot connect to database
Verify that the WORDPRESS_DB_HOST value matches the service name in docker-compose.yml (typically db:3306). Ensure the database container is healthy before WordPress starts by using the depends_on condition shown in the configuration above.
Xdebug not connecting
Confirm that host.docker.internal resolves correctly inside the container. On Linux, you may need to add extra_hosts: - "host.docker.internal:host-gateway" to your WordPress service definition.
File permission errors
If WordPress cannot write to wp-content/uploads, adjust permissions inside the container:
docker compose exec wordpress chown -R www-data:www-data /var/www/html/wp-content/uploadsNext steps for your workflow
Once you have Docker and Composer running, consider these additions to further professionalize your setup:
- WP-CLI as a Composer dependency for scripted WordPress management.
- PHPStan or Psalm for static analysis of your theme and plugin PHP code.
- GitHub Actions or GitLab CI for automated testing on every pull request.
- Redis or Memcached as an additional Docker service for object caching during development.
- Traefik or Nginx Proxy for managing multiple local WordPress projects with custom domains instead of port numbers.
Modern WordPress engineering means treating your site like a software product, with reproducible builds, automated testing, and safe deployments. The tools covered in this guide, Docker Compose for environments and Composer with Bedrock for dependency management, form the foundation that every serious WordPress team needs in 2026.
At wppoland.com, we build and maintain WordPress projects using exactly these workflows. If your team needs help modernizing its WordPress development process, setting up CI/CD pipelines, or migrating from legacy setups to containerized environments, our engineering team is available for consulting and implementation. Pricing is always individual and depends on the scope of your project.